
Your kitchen gets dirty faster than any other room in the house. Grease builds up on the stovetop, grime hides behind the faucet, and the refrigerator slowly turns into a science experiment. A solid kitchen cleaning tutorial gives you a clear system so none of that compounds into an overwhelming mess. This guide walks you through exactly what to clean, how often, and with what products — covering daily habits, weekly routines, and seasonal deep cleans that keep your kitchen genuinely hygienic and organized.
Table of Contents
- Key takeaways
- Your kitchen cleaning tutorial starts here
- Cleaning supplies that actually do the job
- Daily tasks that take 15 minutes or less
- Weekly cleaning routine for appliances and surfaces
- Seasonal deep cleaning: the full reset
- Common kitchen cleaning mistakes to avoid
- My take on making kitchen cleaning actually stick
- Let Smartcleaningwa handle the heavy lifting
- FAQ
Key takeaways
| Point | Details |
|---|---|
| Use a tiered schedule | Follow a daily, weekly, and quarterly plan to keep cleaning manageable and consistent. |
| Prep the right supplies | A kit of five to seven specialized products handles every kitchen surface without causing damage. |
| Work top to bottom | Always clean from upper surfaces down to the floor to avoid re-soiling areas you already cleaned. |
| Dwell time cuts effort | Let cleaning sprays sit for five to fifteen minutes before wiping to dissolve grease with less scrubbing. |
| Rotate deep clean tasks | Spread deep cleaning chores throughout the month instead of tackling everything in one session. |
Your kitchen cleaning tutorial starts here
Every effective kitchen cleaning tutorial is built on the same foundation: the right tools, a realistic schedule, and a workflow that actually prevents you from cleaning the same surface twice. Experts recommend a tiered schedule covering daily resets, weekly maintenance, and quarterly deep cleans. That structure is exactly what this guide follows.
Before you spray a single surface, you need to understand what you are working with. The products that work on sealed granite will damage wood cabinets. The technique that cleans a stainless steel sink will scratch a porcelain one. Start by knowing your surfaces and matching your products to them.
Cleaning supplies that actually do the job
Getting the right tools together is step one of any kitchen deep cleaning guide worth following. A basic cleaning kit of five to seven specialized items covers the full range of kitchen surfaces without redundancy.
Here is what belongs in your kit:
- Degreaser for stovetops, range hoods, and cabinet fronts near the stove
- Disinfectant spray rated for food-contact surfaces, used on countertops and cutting boards
- Microfiber cloths in two colors: one for counters, one for appliances, so you never cross-contaminate
- Scrub brushes in two sizes: a large one for sinks and a small one (an old toothbrush works) for faucet bases and grout lines
- Non-abrasive sponges for glass cooktops and stainless appliances
- Rubber gloves to protect your hands from prolonged chemical contact
- Floor cleaner matched to your flooring material, whether tile, hardwood, or vinyl
| Product | Best use | Surfaces to avoid |
|---|---|---|
| Degreaser | Stovetop, hood, cabinet fronts | Unsealed stone, wood |
| Disinfectant spray | Countertops, sink basin | Marble, colored grout |
| White vinegar solution | Microwave interior, glass surfaces | Natural stone, cast iron |
| Baking soda paste | Stubborn stains, sink scrubbing | Aluminum, stainless steel scratches |
| Dish soap + warm water | Daily wipe-downs, most surfaces | None |
Pro Tip: Buy two sets of microfiber cloths and keep them in separate labeled bags. One set is for food-prep surfaces, one is for everything else. You will never wonder whether a cloth is clean enough to use near food again.
Surface compatibility matters more than most people realize. Avoid bleach or abrasive products on natural stone, unsealed wood, and colored grout. These materials stain, pit, or lose their finish permanently when exposed to the wrong chemicals.
Daily tasks that take 15 minutes or less
The biggest myth about kitchen hygiene is that you need long cleaning sessions to stay on top of it. Daily maintenance tasks take five to fifteen minutes and prevent mess from stacking up into something that requires a full hour to address. These healthy daily habits are the fastest return on investment in any cleaning routine.
Think of the end of each cooking session as a “kitchen reset.” The goal is to return the kitchen to a neutral state before you leave it. That means:
- Wipe down countertops and the stovetop after every meal
- Rinse the sink basin and run a quick scrub with dish soap
- Empty the trash if it is full or smells
- Put away all dishes, utensils, and food items
- Spot clean any splatter on cabinet doors or the backsplash
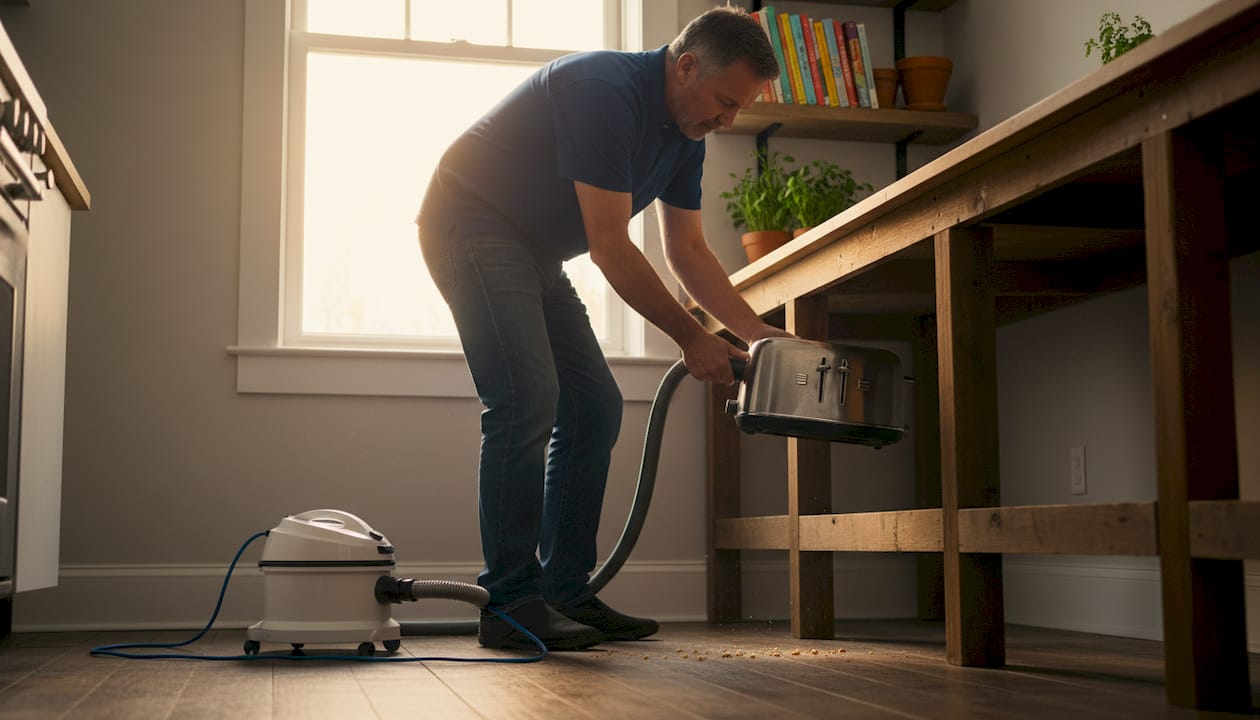
- Wipe the exterior of the microwave if it was used
- Clean the faucet base and handles with a damp cloth
Two spots most people skip every day: light switches near the kitchen and the faucet base. Faucet bases and drains are among the germiest spots in any kitchen. A quick scrub with an old toothbrush and some dish soap takes thirty seconds and makes a real difference.
Pro Tip: Spray your stovetop and countertops before you eat dinner, not after. Let the product sit for 5 to 15 minutes while you eat, and the grease will wipe off with almost no effort when you clear the table.
Weekly cleaning routine for appliances and surfaces
Once a week, you need to go deeper than the daily reset. This is where appliance maintenance and surface care come in. The best kitchen cleaning methods at this level focus on rotating tasks so you are not doing everything in one exhausting block.
Here is a practical step-by-step kitchen cleaning sequence for your weekly session:
- Clear all countertops completely. Remove appliances, canisters, and décor before you wipe anything down.
- Spray cabinet fronts and backsplash with a degreaser and let it dwell for five minutes before wiping.
- Clean the microwave interior. Place a bowl of water with a few lemon slices inside, run it for three minutes, then wipe down the softened residue.
- Degrease the stovetop. Remove grates or burner covers and soak them in hot soapy water while you clean the surface itself.
- Spot clean the refrigerator exterior and handle. Use a disinfectant wipe on handles, since they carry bacteria from hands every single day.
- Scrub the sink basin with a non-abrasive cleaner, paying attention to the drain opening and the overflow hole.
- Wipe down the dishwasher exterior and check the dishwasher filter. A clogged filter is the number one reason dishes come out smelling stale.
- Mop or clean the floor last. Always clean the floor after everything above it.
A note on wood cabinets and stone countertops: never use the same wet cloth on both. Wood cabinets swell with excess moisture, and stone countertops scratch with gritty residue. Use a barely damp cloth on wood and rinse your stone counters with a pH-neutral cleaner.
Pro Tip: Vacuum under and behind appliances before you mop the floor. Crumbs and debris near the baseboards will turn into a muddy paste the moment they touch a wet mop.
Seasonal deep cleaning: the full reset
A true deep clean goes places the weekly routine never touches. Experts put deep cleans on a quarterly schedule, with each session taking four to six hours. That sounds like a lot until you realize you are doing it only four times a year.
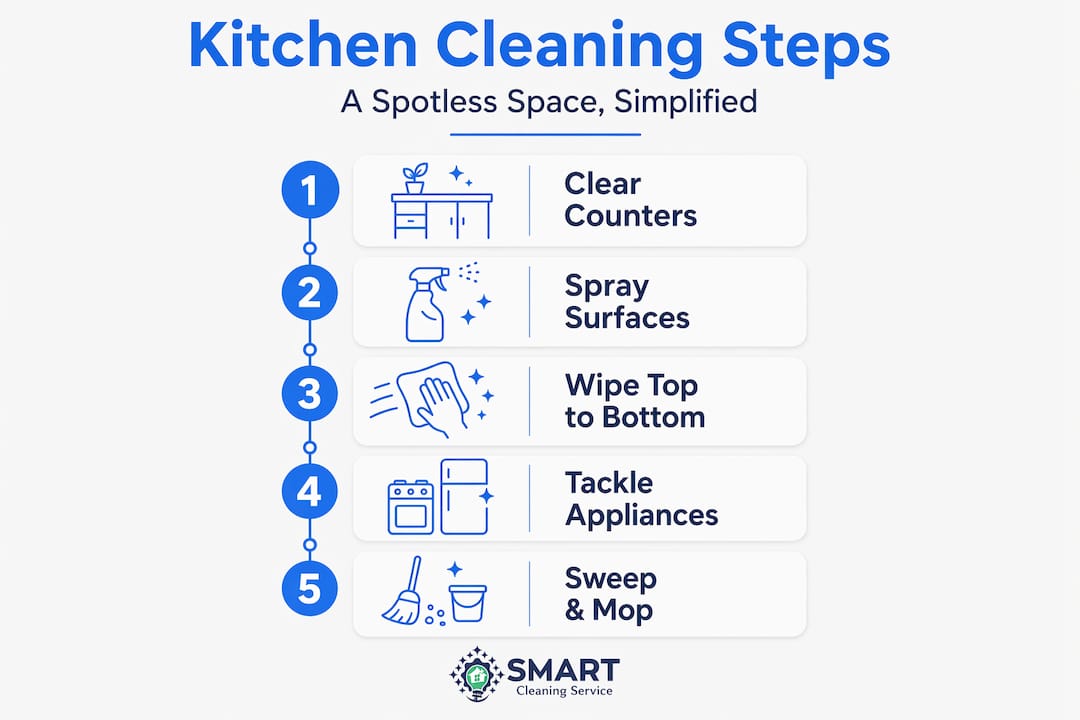
The professional approach is to work from top to bottom and farthest point to exit. Start at the ceiling and upper cabinets, then move to appliances and counters, and finish with the floor just before you leave the room. This prevents grime from upper surfaces from falling onto areas you already cleaned.
Here is a comparison of what each cleaning level covers:
| Task category | Daily | Weekly | Quarterly |
|---|---|---|---|
| Countertops and stovetop | Yes | Yes (deeper) | Yes (full degrease) |
| Appliance interiors | No | Spot only | Full clean |
| Behind and under appliances | No | No | Yes |
| Cabinet interiors and shelves | No | No | Yes |
| Refrigerator coils and drawer seals | No | No | Yes |
| Oven interior | No | No | Yes |
| Drain and disposal maintenance | No | Occasional | Yes |
| Time required | 5 to 15 min | 30 to 60 min | 4 to 6 hours |
For a deep clean, breaking the kitchen into zones makes it manageable rather than overwhelming. Tackle the refrigerator as its own zone, the oven as another, and the cabinets as a third. You can even spread these zones across several days if a single session feels like too much.
Pro Tip: Before you scrub your range hood filters or greasy pans, soak them in hot water with a few drops of degreaser for twenty minutes. The grease breaks down on its own, and you spend far less time scrubbing.
A quarterly deep clean is not optional maintenance. It protects the longevity of your appliances, removes bacteria that daily cleaning misses, and keeps your kitchen genuinely healthy rather than just surface-clean.
For a detailed room-by-room breakdown, the step-by-step deep clean guide from Smartcleaningwa covers the full home sequence alongside the kitchen.
Common kitchen cleaning mistakes to avoid
Even with the best intentions, small errors can damage surfaces or leave your kitchen less clean than it looks. Here are the ten most common mistakes, along with what to do instead:
- Using bleach on stone countertops. Bleach degrades the sealant on granite and marble. Use a pH-neutral cleaner instead.
- Skipping the dishwasher filter. A dirty filter recirculates food particles onto clean dishes. Remove and rinse it monthly.
- Washing cast iron with soap. Soap strips the seasoning. Use hot water and a stiff brush, then dry immediately.
- Letting knives soak in water. It ruins the edge and the handle. Wash and dry knives by hand right after use.
- Spraying cleaner directly on appliance controls. Liquid seeps into buttons and causes electrical damage. Spray your cloth, then wipe.
- Cleaning the floor before the counters. You will track debris back onto a wet floor. Always clean top to bottom.
- Ignoring cabinet door handles and knobs. These collect grease and bacteria from cooking hands. Wipe them weekly.
- Using abrasive scrubbers on glass cooktops. They leave permanent micro-scratches. Use a dedicated glass cooktop cleaner.
- Overloading the dishwasher. Dishes need space for water to reach all surfaces. An overloaded load usually means rewashing.
- Skipping the area behind the refrigerator. Dust on refrigerator coils forces the compressor to work harder, raising your energy bill and shortening the appliance’s life.
My take on making kitchen cleaning actually stick
I’ve worked with enough homeowners to know that the routine they follow long-term is rarely the most thorough one. It is the most sustainable one. What I’ve seen work consistently is rotating deep cleaning chores monthly instead of treating every deep clean as an all-or-nothing event.
In my experience, the people who keep the cleanest kitchens are not the ones who spend hours cleaning on weekends. They are the ones who do two minutes here and five minutes there without making it a big deal. The kitchen cleaning tips that stick are the ones that feel small enough to actually do every day.
I also think the right cleaning products genuinely matter for motivation. A spray that smells good and works quickly is one you will actually reach for. That is not a minor detail. Pleasant-scented cleaning products have a real effect on how motivated people feel to clean regularly. Pick products you like using.
The advice in this guide is a starting point. Adapt it to your kitchen size, your cooking habits, and your schedule. A household that cooks twice a week needs a different rhythm than one that cooks every night. Give yourself permission to adjust.
— Wilker
Let Smartcleaningwa handle the heavy lifting
Staying on top of daily and weekly tasks is very manageable with the right system. But the quarterly deep clean is a different story. Oven interiors, refrigerator coil vacuuming, cabinet degreasing — these are jobs that take real time and the right professional-grade products to do correctly.

Smartcleaningwa provides professional deep cleaning for kitchens and entire homes across Seattle, Kirkland, Bellevue, and Redmond. If you want a quarterly reset without spending your weekend on it, the team at Smartcleaningwa handles everything from top to bottom. You can also explore residential cleaning plans for ongoing kitchen upkeep between deep cleans. Get a free estimate and see what regular professional service looks like for your home.
FAQ
How often should I deep clean my kitchen?
Most kitchens need a thorough deep clean every three to four months. This covers oven interiors, cabinet shelves, behind appliances, and refrigerator coils that daily and weekly cleaning never reaches.
What is the best order to clean a kitchen?
Always work from top to bottom and from the farthest point in the room toward the exit. Clean upper cabinets and shelves first, then appliances and countertops, and finish with the floor so debris falls downward and gets swept up last.
What supplies do I need for a kitchen deep cleaning guide?
A core kit includes a degreaser, food-safe disinfectant, microfiber cloths, scrub brushes in two sizes, non-abrasive sponges, rubber gloves, and a floor cleaner matched to your flooring type.
How do I remove stubborn grease from kitchen surfaces?
Apply a degreaser and let it sit for at least five to fifteen minutes before wiping. For baked-on grease on grates and filters, soak them in hot soapy water for twenty minutes before scrubbing to reduce the effort significantly.
Can I use the same cleaning products on all kitchen surfaces?
No. Bleach and abrasive cleaners damage natural stone, unsealed wood, and aluminum. Always check surface compatibility before applying any product, and use pH-neutral cleaners on stone countertops and wood cabinets to avoid permanent damage.
Recommended
- Smart Cleaning Service™ House Cleaning Seattle Kirkland Bellevue Redmond
- Smart Cleaning Service™ House Cleaning Seattle Kirkland Bellevue Redmond
- Smart Cleaning Service™ House Cleaning Seattle Kirkland Bellevue Redmond
- Smart Cleaning Service™ House Cleaning Seattle Kirkland Bellevue Redmond


