
A tenant move out inspection is the formal walkthrough of a rental unit at lease end, comparing its current condition to the documented state at move-in to determine damage and security deposit deductions. Also called a move-out walkthrough or final property inspection, this process is the legal foundation for what a landlord can and cannot charge a departing tenant. Both renters and property owners benefit from understanding the move out inspection process before the final day arrives.
What is the tenant move out inspection process?
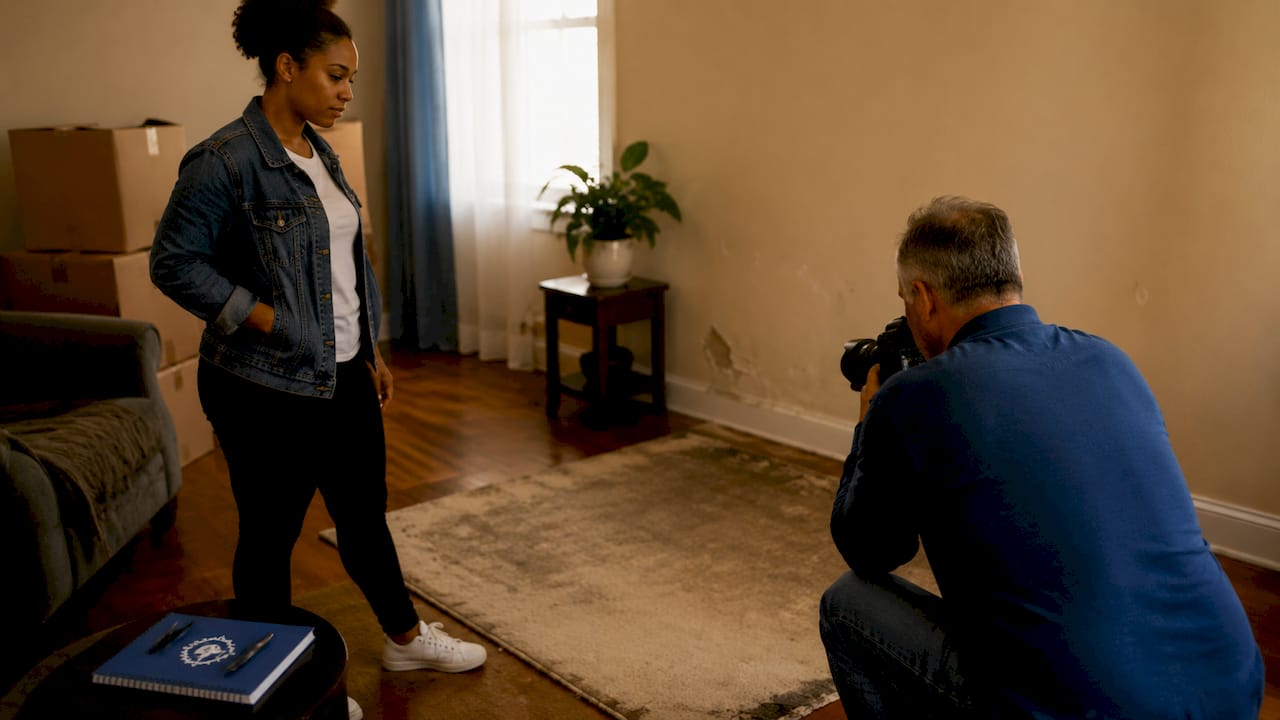
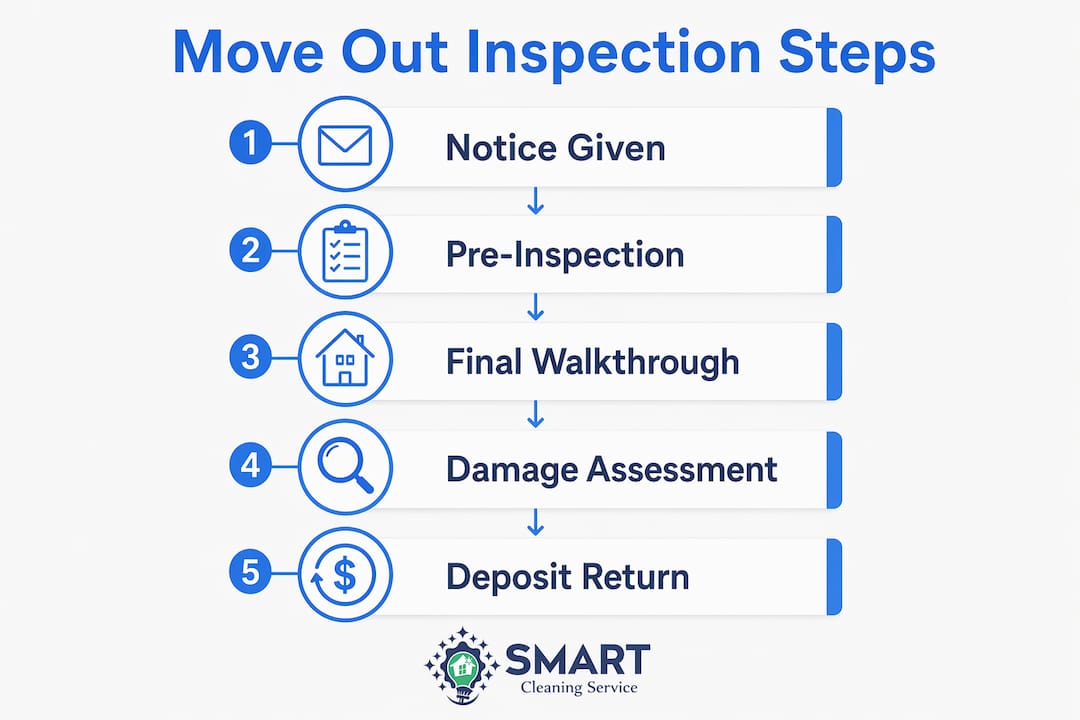
The move out inspection process follows a structured path from scheduling to documentation to deposit decisions. A landlord or property manager walks through every room of the unit, comparing current conditions against the original move-in report. The goal is to identify damage beyond normal wear and tear and record it with enough evidence to support or dispute any deductions.
What gets inspected during a standard walkthrough:
- Walls and ceilings: Scuffs, holes, stains, or unauthorized paint colors
- Floors: Scratches, stains, burns, or missing tiles beyond expected aging
- Kitchen: Appliance condition, cabinet interiors, countertop damage, grease buildup
- Bathrooms: Grout condition, fixture damage, mold or mildew beyond normal use
- Windows and doors: Broken glass, damaged frames, missing hardware
- Exterior and common areas: Balconies, parking spots, storage units, and shared spaces
Documentation methods have evolved well beyond a paper checklist. Most professional property managers now use timestamped photos, written condition reports, and continuous video walkthroughs of the vacant unit, which provide superior evidence compared to individual photos and reduce dispute risks. A detailed tenant inspection checklist keeps the process consistent and legally defensible.
Tenant presence during the inspection is not legally required in most states, but attending is strongly recommended. When tenants walk through alongside the landlord, they can address concerns in real time and avoid surprises when the deposit statement arrives.
What are the legal timelines for move out inspections?
Most U.S. states require landlords to perform move out inspections within 3–30 days after a tenant vacates and to send itemized deduction notices within 21–45 days. Missing these deadlines can cost landlords their right to make deductions entirely. That consequence makes the timeline one of the most critical parts of the entire process.
| State | Pre-Move-Out Inspection Required | Deduction Notice Deadline |
|---|---|---|
| California | Yes | 21 days |
| Arizona | Yes | 14 business days |
| Maryland | Yes | 45 days |
| Washington | No | 21 days |
| Texas | No | 30 days |
States like California, Arizona, and Maryland require landlords to offer a pre-move-out inspection before the tenant leaves. This gives tenants a chance to fix repairable damage before the final walkthrough. Tenants in these states who are not offered this opportunity may have grounds to challenge deductions.
Landlords must also provide proper notice before entering a unit for inspection, typically 24–48 hours in advance depending on state law. Conducting inspections within 1–3 days of the tenant vacating preserves the evidentiary value of findings and strengthens the landlord’s legal position. Waiting two weeks to inspect creates a window where new damage could be attributed to the previous tenant, or where a tenant could claim damage occurred after they left.
How do landlords tell normal wear and tear from real damage?
Normal wear and tear is defined as the expected, gradual deterioration of a property from ordinary use over time. It is not chargeable to the tenant. Damage caused by negligence, misuse, or accidents is chargeable. The line between the two is where most deposit disputes begin.
Examples of normal wear and tear:
- Small nail holes from hanging pictures
- Faded paint or minor scuffs on walls
- Carpet pile flattening in high-traffic areas
- Loose door hinges from regular use
Examples of tenant-caused damage:
- Large holes in drywall
- Burns or deep stains on carpet or countertops
- Broken window glass or cracked tiles
- Unauthorized modifications like removed fixtures
Without move-in baseline photos and signed reports, security deposit deductions for damage are rarely defensible in court. Courts generally side with tenants when landlords cannot prove the damage did not exist at move-in. A signed move-in condition report with timestamped photos is the single most important document a landlord can hold.
Pro Tip: Place a common household object like a coin or a pen next to damage when photographing it. The scale reference makes the severity of the damage immediately clear in any legal or mediation context.
How should tenants and landlords prepare for a move out inspection?
Preparation on both sides reduces disputes and speeds up the deposit return. The move out inspection works best when both parties treat it as a shared confirmation of facts rather than an adversarial audit.
For tenants, follow these steps before the inspection:
- Complete a deep clean of the entire unit. Pay special attention to appliances, bathrooms, and baseboards. A professional move out cleaning service can address areas that are easy to miss.
- Make minor repairs yourself. Fill small nail holes, replace burned-out light bulbs, and clean or replace HVAC filters.
- Walk through with your original move-in report. Compare each room against the documented starting condition before the landlord arrives.
- Attend the inspection. Your presence allows you to ask questions and note any disagreements on the spot.
- Document your own condition before leaving. Take timestamped photos and a short video of every room on your final day.
For landlords, the most effective practices are:
- Schedule the inspection within 1–3 days of vacancy.
- Use a room-by-room checklist that mirrors the original move-in report.
- Bring an outlet tester. Small tools like outlet testers reveal hidden electrical issues that tenants might overlook and that could otherwise be missed entirely.
- Record a continuous, unedited video walkthrough before touching anything in the unit.
- Offer tenants the chance to sign the report and write any disagreements directly on it.
Pro Tip: Having tenants sign inspection reports and note disagreements “without prejudice” creates a documented record that the tenant acknowledged the findings, even if they disputed them. This prevents later claims that findings were fabricated.
How does the move out inspection affect security deposits and turnover?
The move out inspection is the direct trigger for security deposit decisions. Every deduction a landlord makes must trace back to documented findings from the inspection. Without that documentation, deductions are legally vulnerable.
Rental unit turnover costs range between $2,500 and $4,000, and the full turnover process typically takes 14–30 days after the tenant vacates. A thorough inspection on day one of that window sets the entire timeline in motion. Landlords who delay the inspection delay every downstream step, including repairs, cleaning, re-listing, and new tenant placement.
| Scenario | With Thorough Inspection | Without Thorough Inspection |
|---|---|---|
| Deposit deduction disputes | Resolved quickly with photo and video evidence | Likely to escalate to mediation or court |
| Turnover timeline | 14–30 days with clear repair scope | Extended by unclear damage attribution |
| Re-listing readiness | Faster, with documented condition baseline | Delayed by unresolved disputes |
| Legal defensibility | Strong, with signed reports and timestamped media | Weak, courts favor tenants without documentation |
Framing move out inspections as collaborative condition confirmations rather than damage hunts reduces disputes and encourages transparency from both sides. Landlords who communicate the purpose of the inspection clearly and invite tenants to participate tend to resolve deposit questions faster and with less conflict. The inspection is not just a legal formality. It is the clearest path to a clean handoff between tenants.
Key takeaways
A thorough move out inspection, completed within 1–3 days of vacancy and backed by timestamped photos, a signed checklist, and a continuous video walkthrough, is the most reliable way to protect both the tenant’s deposit and the landlord’s legal standing.
| Point | Details |
|---|---|
| Inspect within 1–3 days | Early inspections preserve evidence and strengthen the landlord’s legal position. |
| Use video and photos together | Continuous video walkthroughs provide stronger dispute defense than photos alone. |
| Know your state’s deadlines | Deduction notices are due within 21–45 days depending on state law. |
| Document move-in conditions first | Without a signed baseline report, deposit deductions are rarely defensible in court. |
| Tenants should attend and document | Attending the inspection and noting disagreements in writing prevents fabrication claims. |
The inspection is a handshake, not a confrontation
I have seen hundreds of deposit disputes that never needed to happen. The pattern is almost always the same: one party skipped a step at the beginning, and both parties paid for it at the end.
The most common mistake landlords make is treating the move out inspection as the starting point. It is not. The inspection is only as strong as the move-in documentation behind it. If you did not take photos on day one, did not get a signed condition report, and did not note pre-existing damage in writing, you are walking into the final inspection with no baseline. Courts know this. Tenants’ attorneys know this.
The most common mistake tenants make is skipping the inspection entirely. I understand the impulse. Moving is exhausting, and the last thing you want is to stand in an empty apartment while someone writes things down. But your absence removes your ability to challenge anything in real time. A disagreement noted on a signed report carries far more weight than a phone call two weeks later.
The inspections that go smoothly share one quality: both parties showed up prepared. The landlord had the original checklist, the move-in photos, and a clear process. The tenant had cleaned thoroughly, made minor repairs, and brought their own documentation. The walkthrough took 30 minutes, both parties signed, and the deposit was returned within the week.
That outcome is achievable every time. It just requires treating the inspection as a shared confirmation of facts rather than a search for blame. The importance of tenant move out inspections goes beyond legal compliance. Done right, they protect the relationship between landlord and tenant and make the next tenancy start on solid ground.
— Wilker
Get your property inspection-ready with Smartcleaningwa
A clean unit is the single most controllable factor going into a move out inspection. Dirt, grease, and grime are the easiest deductions for a landlord to justify and the easiest for a tenant to prevent.
Smartcleaningwa provides specialized move in and move out cleaning for residential properties across Seattle, Kirkland, Bellevue, and Redmond. Our licensed and insured team covers every detail, from appliance interiors to baseboards, so your unit meets the standard an inspection demands. Whether you are a tenant protecting your deposit or a landlord preparing a unit for the next resident, Smartcleaningwa delivers consistent, documented results. Get a free cleaning estimate and schedule your service before the inspection date.
FAQ
What is a tenant move out inspection?
A tenant move out inspection is a formal walkthrough of a rental unit at lease end, comparing its condition to the documented move-in state to determine damage and security deposit deductions.
How long does a landlord have to return the security deposit?
Most states require landlords to send an itemized deduction notice and return any remaining deposit within 21–45 days of the tenant vacating, depending on state law.
Should tenants be present during the move out inspection?
Tenants are not legally required to attend in most states, but attending allows them to address concerns in real time and note any disagreements directly on the inspection report.
What counts as normal wear and tear?
Normal wear and tear includes minor scuffs, small nail holes, and carpet flattening from regular use. Burns, large holes, and unauthorized modifications are considered tenant-caused damage and are chargeable.
What documentation should landlords use during a move out inspection?
Landlords should use a room-by-room checklist, timestamped photos, and a continuous unedited video walkthrough. Pairing these with a signed move-in condition report creates the strongest legal record for any deposit dispute.
Recommended
- Smart Cleaning Service™ House Cleaning Seattle Kirkland Bellevue Redmond
- Smart Cleaning Service™ House Cleaning Seattle Kirkland Bellevue Redmond
- Smart Cleaning Service™ House Cleaning Seattle Kirkland Bellevue Redmond
- Smart Cleaning Service™ House Cleaning Seattle Kirkland Bellevue Redmond


